

Everything Else


How To: Recover a chair with custom fabric
If that old chair is covered in holes or stains, or boasts a pattern that can best be described as "70s chic" it may be time to update it a bit. In this video learn how to save your favorite comfy chair and recover or reupholster it like a pro. By recovering your furniture yourself you can avoid the cost of buying a new one or paying a professional, with the added bonus of holding on to a long-loved piece of decor.
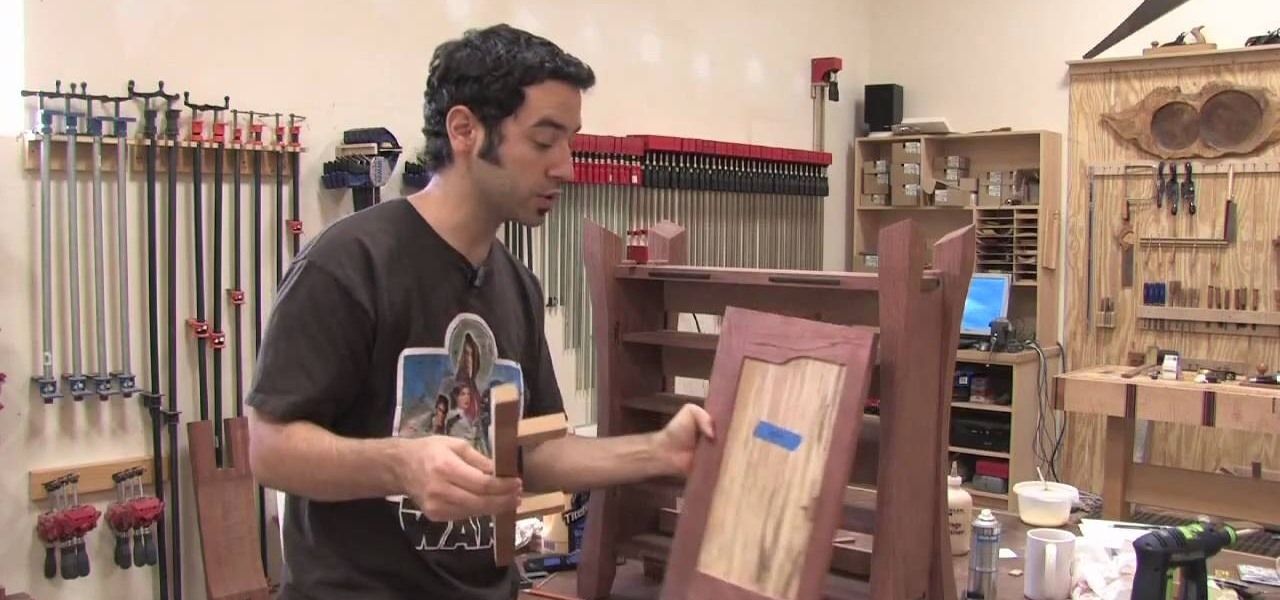
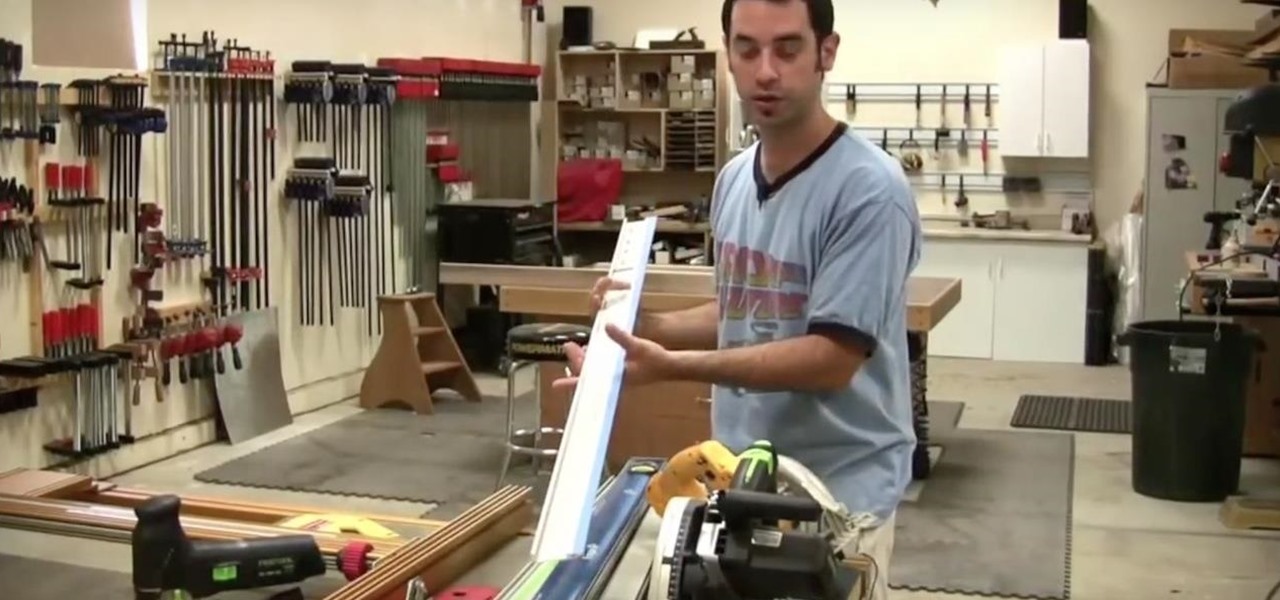
How To: Measure wood by relative dimensioning
The Wood Whisperer demonstrates how we can install hinges on a cabinet without a tape measure, using relative dimensioning. In this example, we use center lines instead of marking the top and bottom of each piece that needs to line up. Using shims at the bottom and top of the door, we center the door on the cabinet to the desired spot. At this point, it's as simple as marking the center lines where you want your hinges to go on both the door and the cabinet frame. Now we can simply attach our...
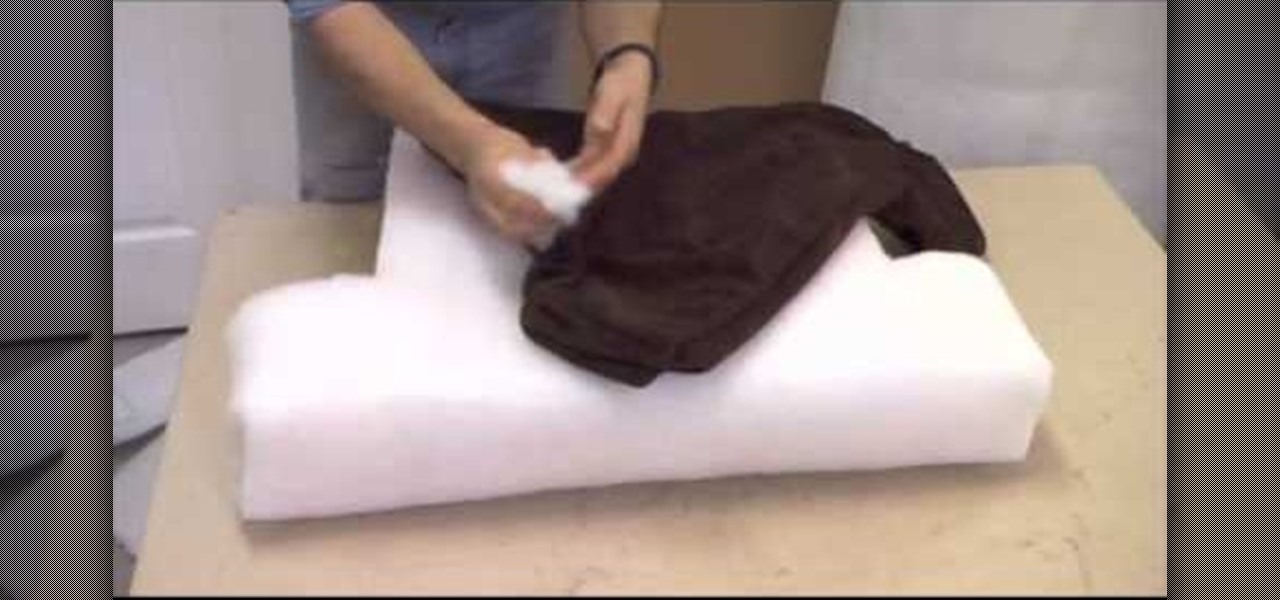
How To: Upholster a cushion
Let's face facts: Upholstering a cushion can be difficult. However, it can also be easy. So easy, in fact, that this video guide can present a complete and thorough overview of the entire process in just over a minute and half of time. Watch to learn a simple upholstery method that will insure your cushion turns out perfect every time!
How To: Re-paint old furniture
If your furniture has seen better days but is nevertheless structurally sound, restoring it might be as simple as applying a fresh layer of paint or wood stain. This free video tutorial demonstrates a method for refinishing furniture with a power sander. For more information, and to get started rejuvenating your own antique furniture, watch this video tutorial.
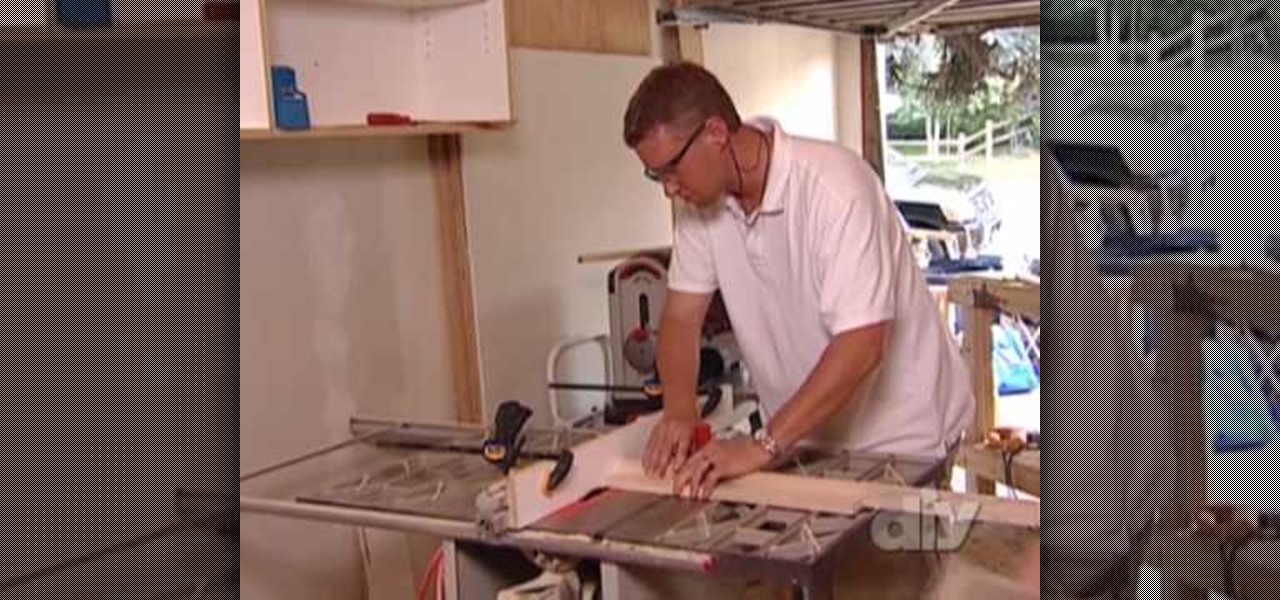
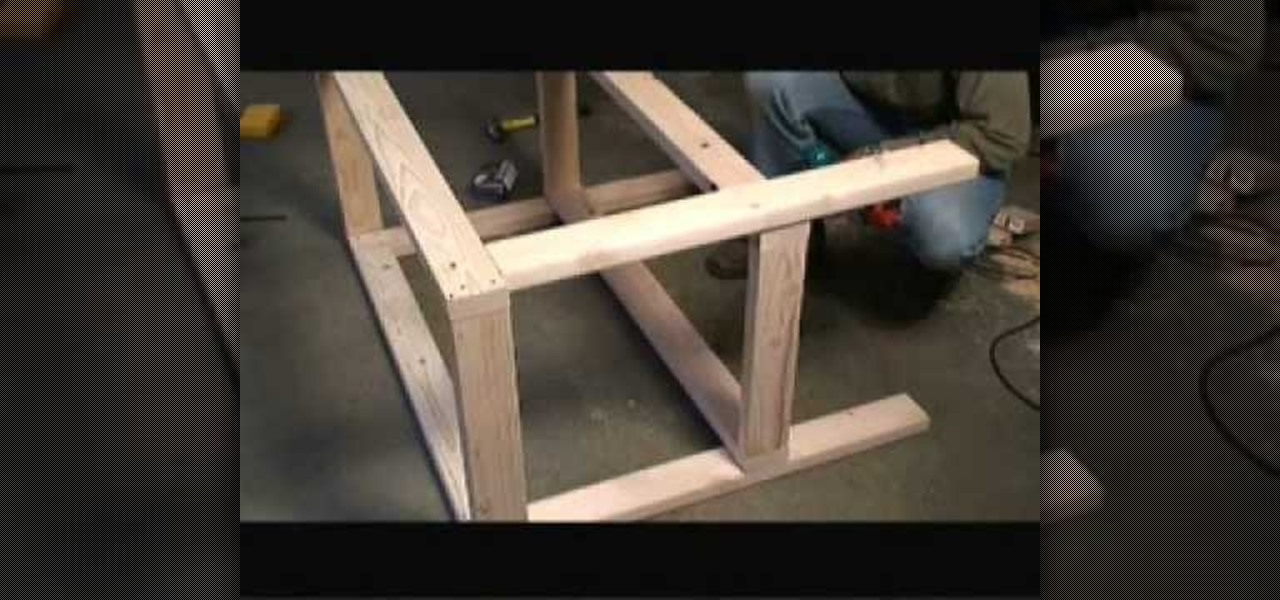
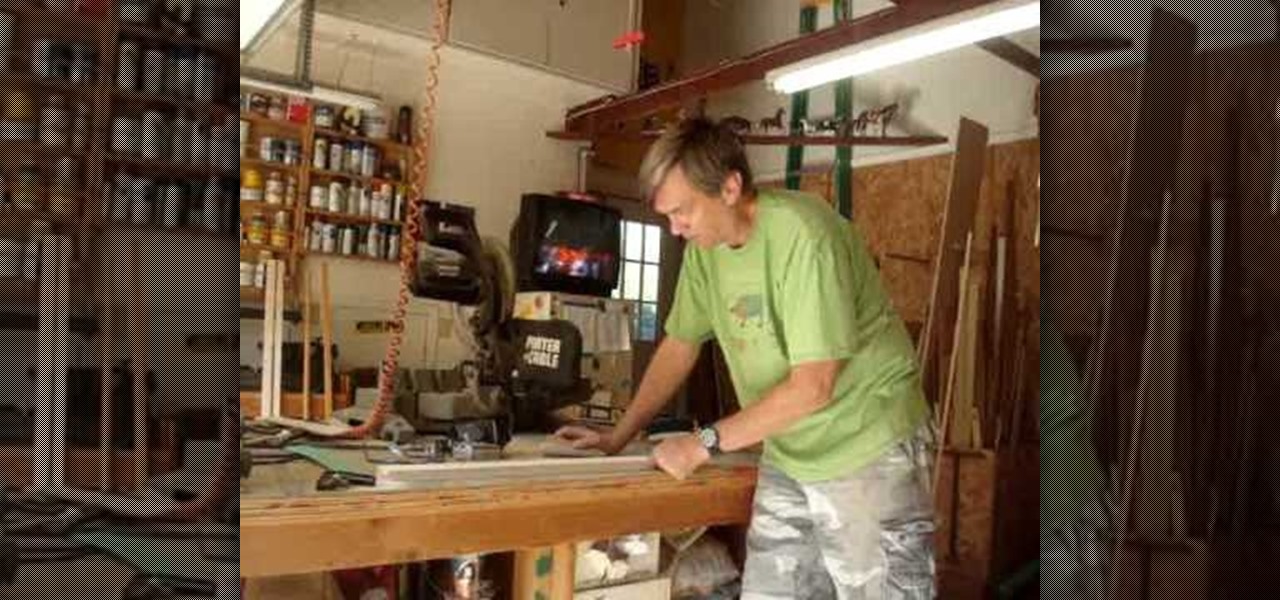
How To: Build your own custom workbench
Enhance your garage with a custom-built workbench. If you can use a wooden workbench, you can build one. And this carpenter's guide, which presents a complete breakdown of the build process, will show you precisely how to do it. For more information, and to get started building your own custom worktable for your garage woodshop, watch this free video guide.
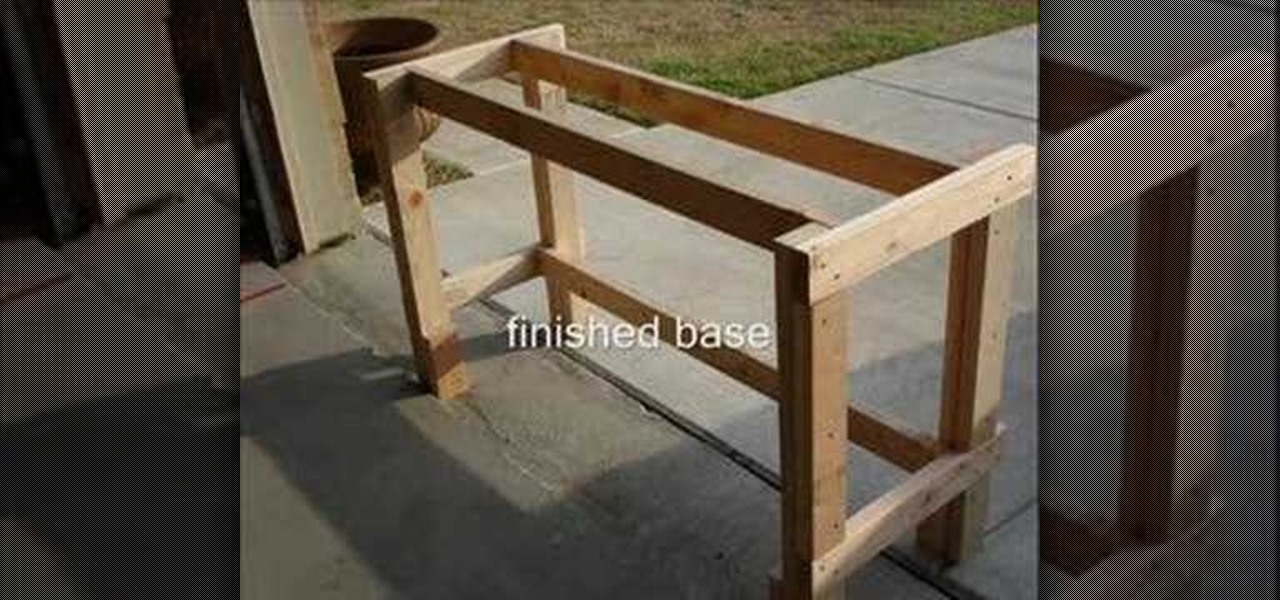
How To: Build a garage workbench
Want a work table for your garage workshop? If you can use a wooden workbench, you can build one. And this carpenter's guide, which presents a complete breakdown of the build process, will show you precisely how to do it. For more information, and to get started building your own custom worktable for your garage woodshop, watch this free video guide.
How To: Build a workbench on a tight budget
A good first project for anyone interested in doing woodworking projects on a regular or semi-regular basis is, naturally, a wooden workbench. This carpenter's guide will help you to build a solid work table without breaking the bank in the process. For more information, including a step-by-step breakdown of the assembly process, watch this free video tutorial.
How To: Build a fireplace mantel
Have an interest in building a protruded mantelpiece for your fireplace? It's easy. So easy, in fact, that this free woodworker's guide can present a complete overview of the process in fewer than 10 minutes. For more information, including a step-by-step look at the mantel (or mantle) building process, watch this DIY guide.
How To: Design and assemble your own custom kitchen cabinets
Beautiful cabinets really make the kitchen, don't they? Not only are cabinets handy storage, they also lend a certain level of elegance to the room depending on their craftmanship. If you would like to perform a kitchen makeover but don't want to hire someone else to do it for you, check out this eight part tutorial on how to build custom kitchen cabinets on your own.
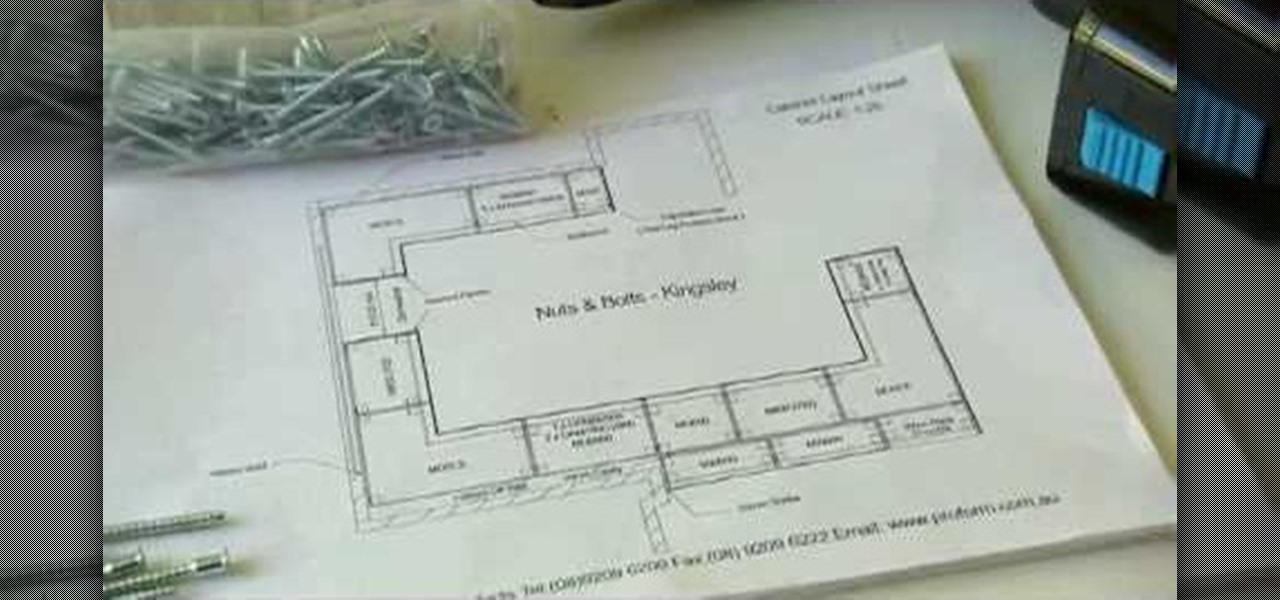
How To: Install a built-in wardrobe
If you're looking for a means of saving money as well as closet space, installing your own built-in wardrobe can be a great way to go. This free DIY video tutorial provides a nuts-and-bolts overview of the entire process.
How To: Make an accurate boomerang
In this Home & Garden video tutorial you will learn how to make an accurate boomerang. Material required are 4-6mm thick ply wood or hard board or paper-mache, saw and some spray paint. Search for and download boomerang plans from the internet. The boomerang has three protrusions or handles equally spaced with each protrusion being 14cm long and the diameter of the circle at their ends being 4.5cm. Trace the plan on the plywood and cut it out with a ‘U’ shaped saw. Next draw out the line for ...
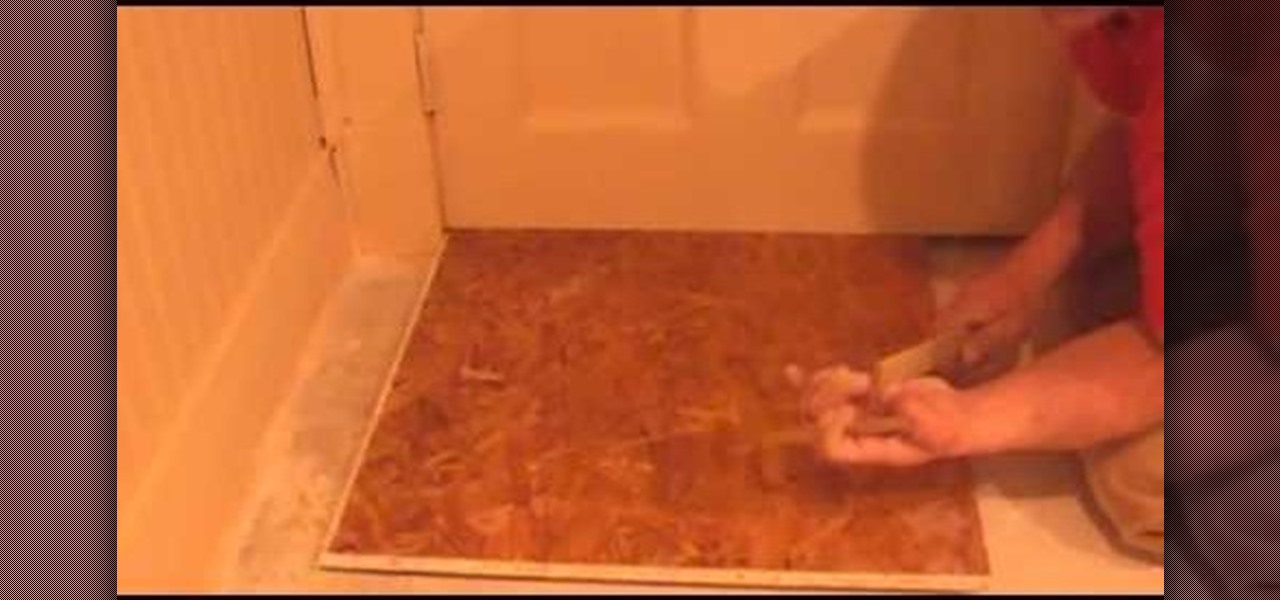
How To: Install Dry Core basement sub floor
First, the plywood or oriented strand board (OSB) subfloor floats on a corrugated or “cleated” waterproof underlayment, so the wood never actually touches the floor. The underlayment material can be made of Styrofoam or heavy-duty polyethylene, the same material used in corrugated plastic drain pipe (one of the toughest plastics available). This underlayment creates an air gap above the concrete. Combined with the wooden panels, the air in this space provides a thermal break that acts as insu...
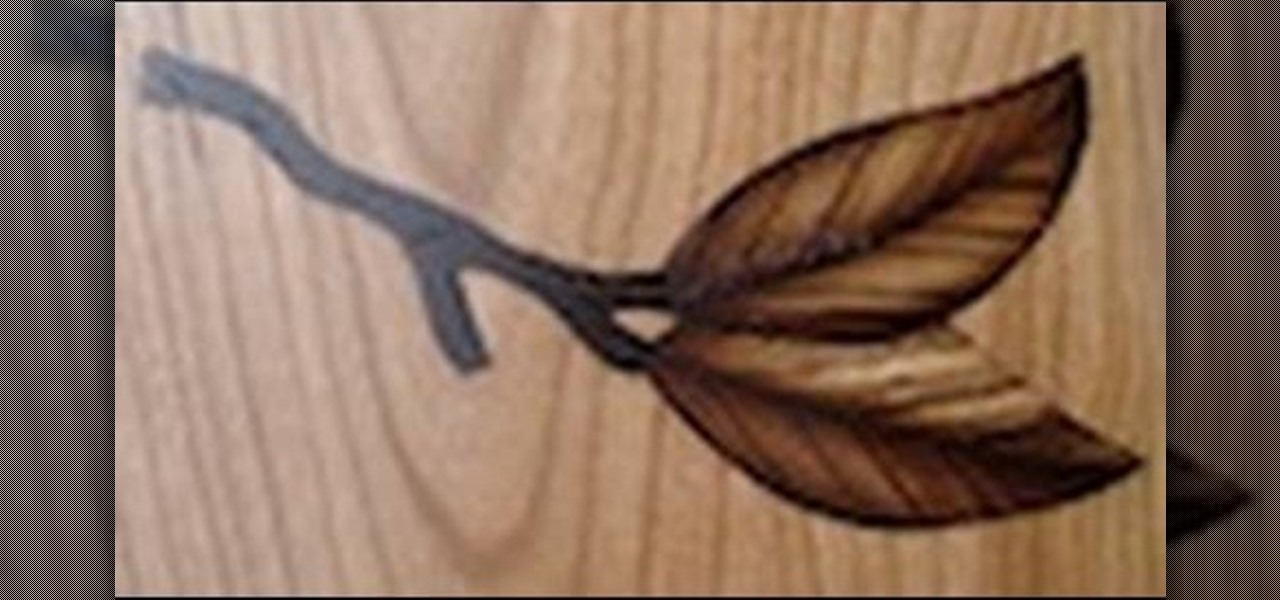
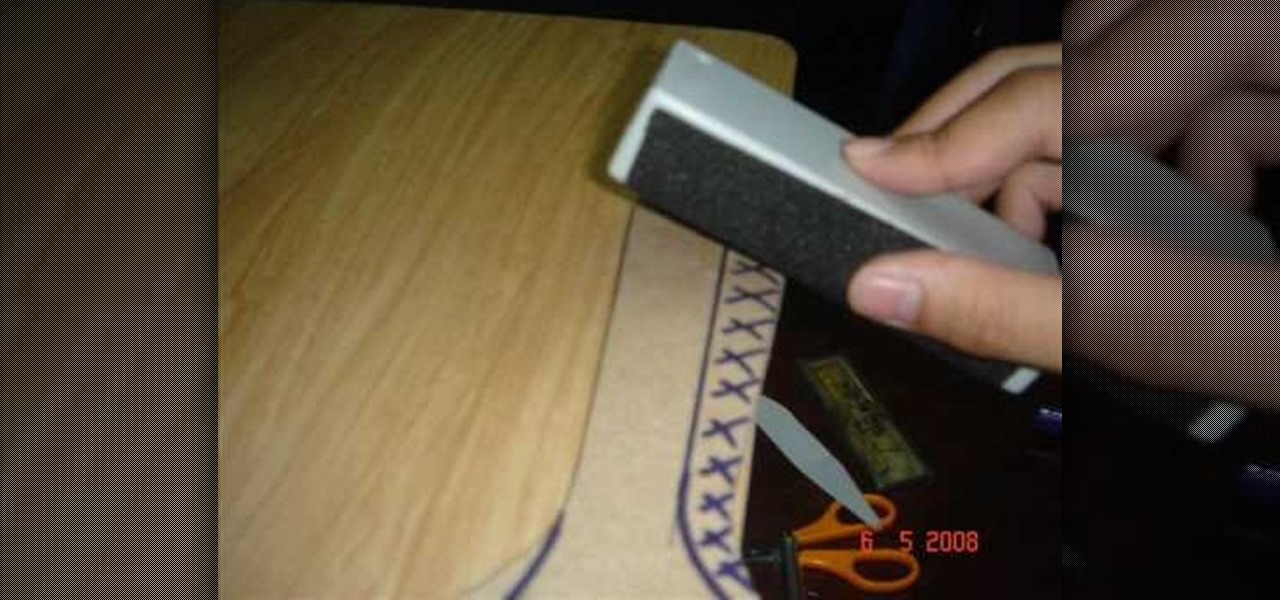
How To: Create router based inlays in woodworking
In this tutorial, you will learn exactly how to make a router-based inlay. And inlay is made up of small cut out sections of wood, and looks like a stencil or pattern when you are finished.
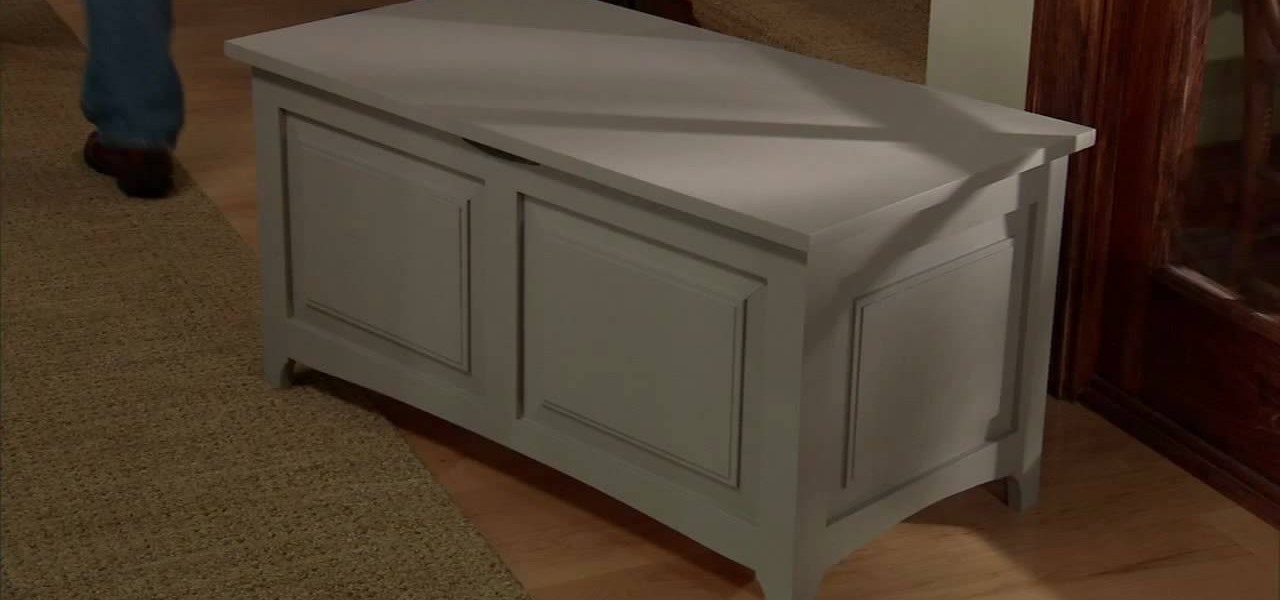
How To: Build a storage chest with Lowe's
In this five part video series, we are going to be creating a gorgeous storage chest that is sure to be a favorite at your house. Over the course of these videos, I will give you easy to follow instructions, along with some helpful hints.

How To: Turn an old door into a desk
Danny Lipford and Allen Lyle demonstrate how to turn an old door into a desk. First, remove the door hinges. Then, fill the biggest part of the voided hardware holes with wood and seal them with bonding adhesive. Don't leave too much excess bonding adhesive on the door or else you'll have to sand it off once it's dried. You may need at least two coats of bonding adhesive to get the surface level. Cut wood for the sides of the desk and then run them over a router. Sand down the door and the ne...

How To: Spray paint Ikea furniture for a girl's bedroom
The video demonstrates the way of converting a plain IKEA cabinet for a girl's bedroom using spray paint. The person presenting us the video uses a pink all-purpose spray paint from Rust-Oleum Painter's Touch. The cabinet to be painted is dismantled and placed on a table. The person recommends to shake the paint spray bottle well before using it. First she paints the cabinet body and then the two cabinet doors using the pink spray paint. Once the spraying is complete, she lets it dry well and...
How To: Use scrap wood to make a picture frame box
Most people have scrap wood hanging around in their garage collecting dust - so why not make a cool gift out of it? This picture frame box can be made in a couple of days and with a little elbow grease. It is a lovely gift for any occasion, and basically free to make.
How To: Apply a deep red mahogany finish to furniture
Add shimmer and color to your wood furniture with a Deep Red Mahogany Finish. Watch as The Wood Whisper's Marc Spagnuolo shows you how to apply this look to anything wood in your home. First Marc tells you about narrowing down whether or not you have to mask the wood or enhance the wood. After you figure that out you must choose how to color your wood. There are stains, oils, dyes and more! Marc chooses both a Merlot General Finishes Water Based Dye and Brown Mahogany General Finishes Gel Sta...
How To: Build a punching bag out of trash
In this video, Danny Lipford will show you how to make a punching bag with trash found at a construction site. First, a circle of plywood is cut out about one foot in diameter (in this video, a bucket is traced in pencil over the plywood). This is for the base of the punching bag. A large piece of PVC pipe is used for the center of the punching bag, which carpet padding is wrapped around to makeup the main part of the bag. Finally, duct tape is wrapped around the whole thing. Out of these ver...
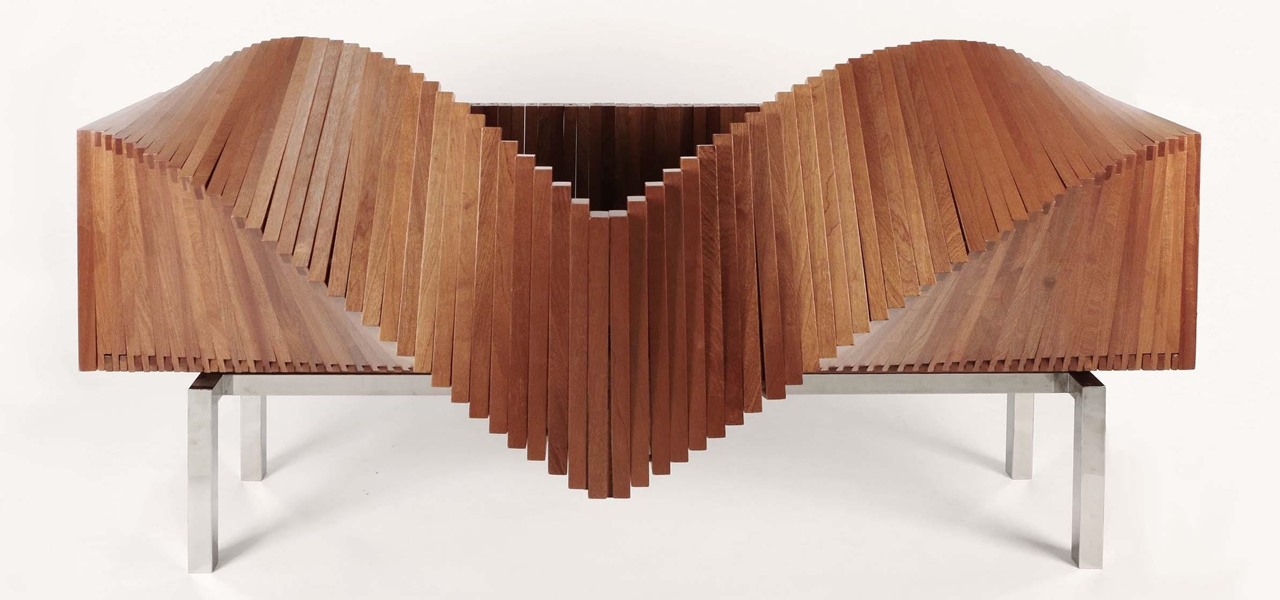
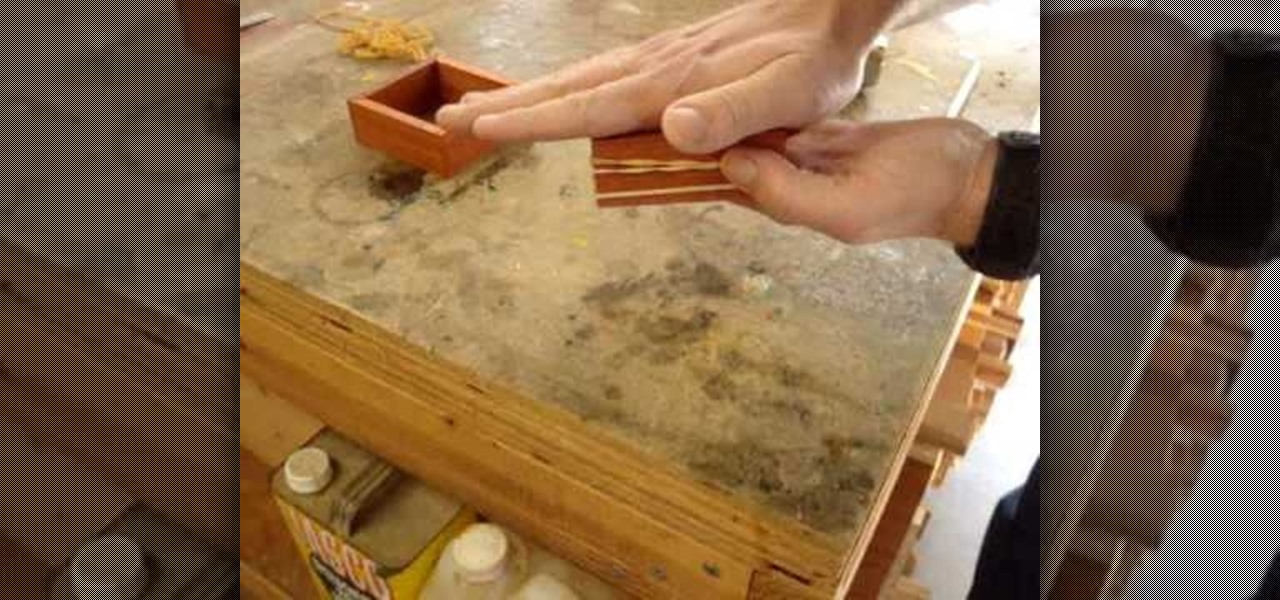
How To: Make your own professional looking jewelry box
A jewelry box is not just a great way to keep your jewels safe, it is also a beautiful addition to your decor. In this video, learn how to make a gorgeous, professional looking jewelry box from walnut, maple and cherry woods. This in depth, seven piece series takes you from selecting your wood, through the finishing touches. These boxes are lovely enough to compete with anything on a store shelf.
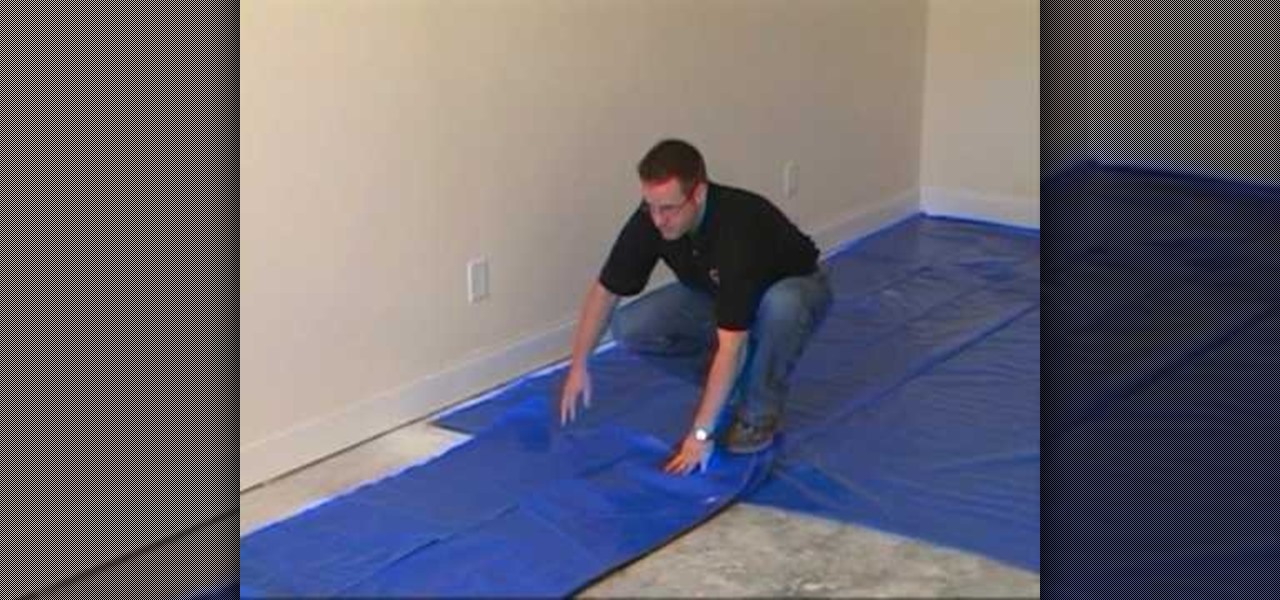
How To: Install the moisture barrier over concrete subfloor
This video describes the process of installing a moisture barrier over a concrete subfloor. The presenter is using 6 mil thick poly barrier. The barrier comes in rolls about twenty-four inches wide. When rolling out the moisture barrier you want to go from wall to wall and cover the entire floor. For optimal moisture control you will want to overlap the poly barrier by at least six inches. The barrier plastic does not need to be taped or secured to the floor at all, it simply lays on top of t...
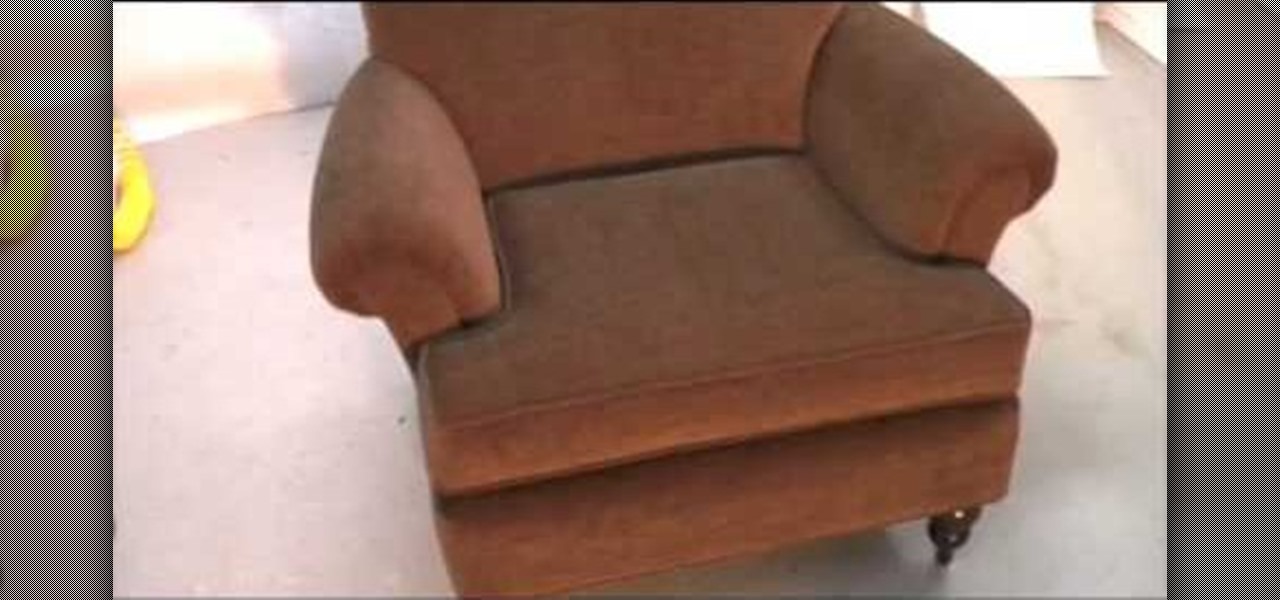
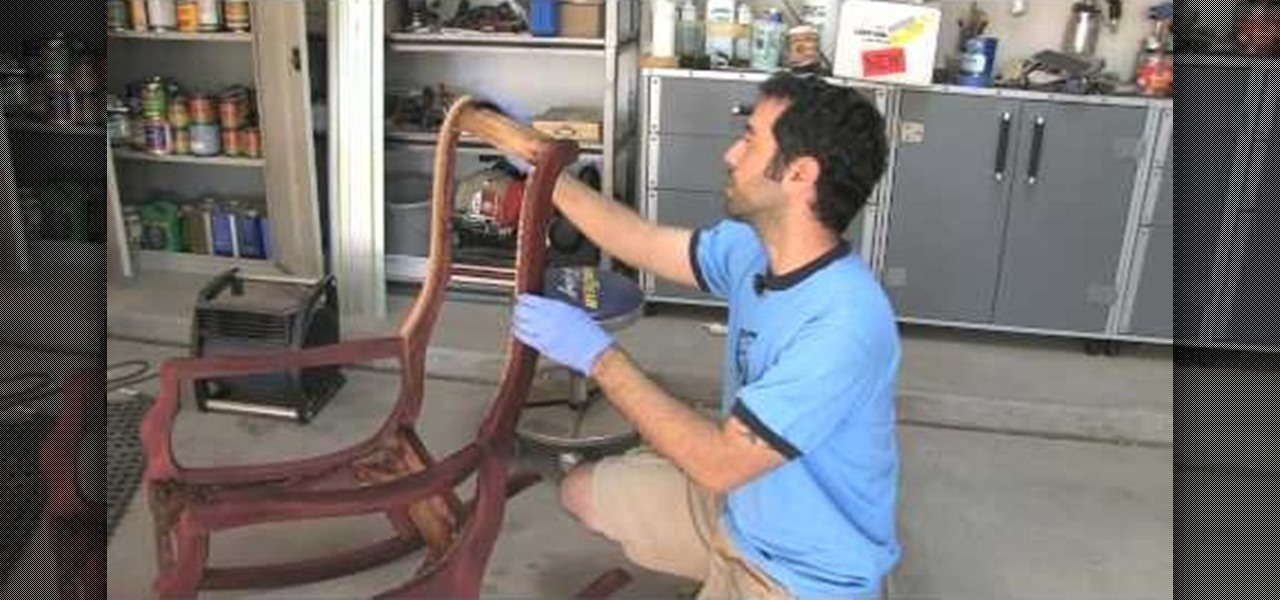
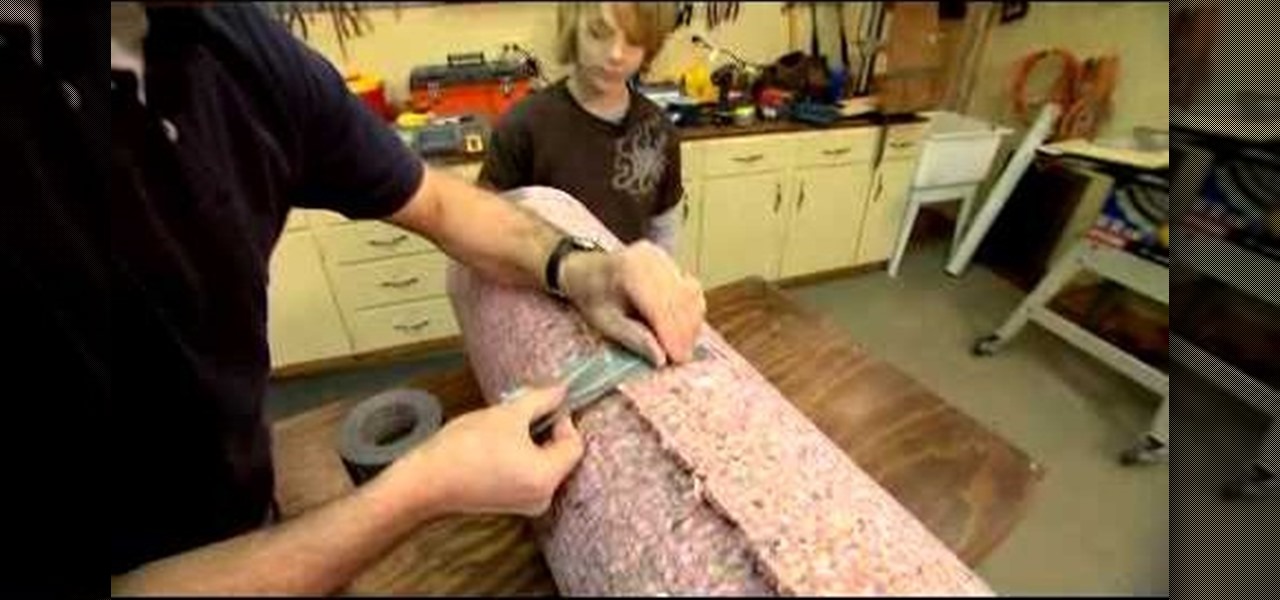
How To: Upholster a full occasional chair
This is a demonstration of how to upholster full an occasion chair. First the seat upholster is removed carefully. The new cloth is cut accordingly to the shape. The edges are folded and stitched. The cloth is spread over the seat, tucked under the hand rest stretched to the bottom and nailed. For the hand rest a rectangular cloth of required color is cut. A piece of foam is spread over the hand rest and covered with the upholstery cloth and stapled at the sides and bottom. The back rest is r...
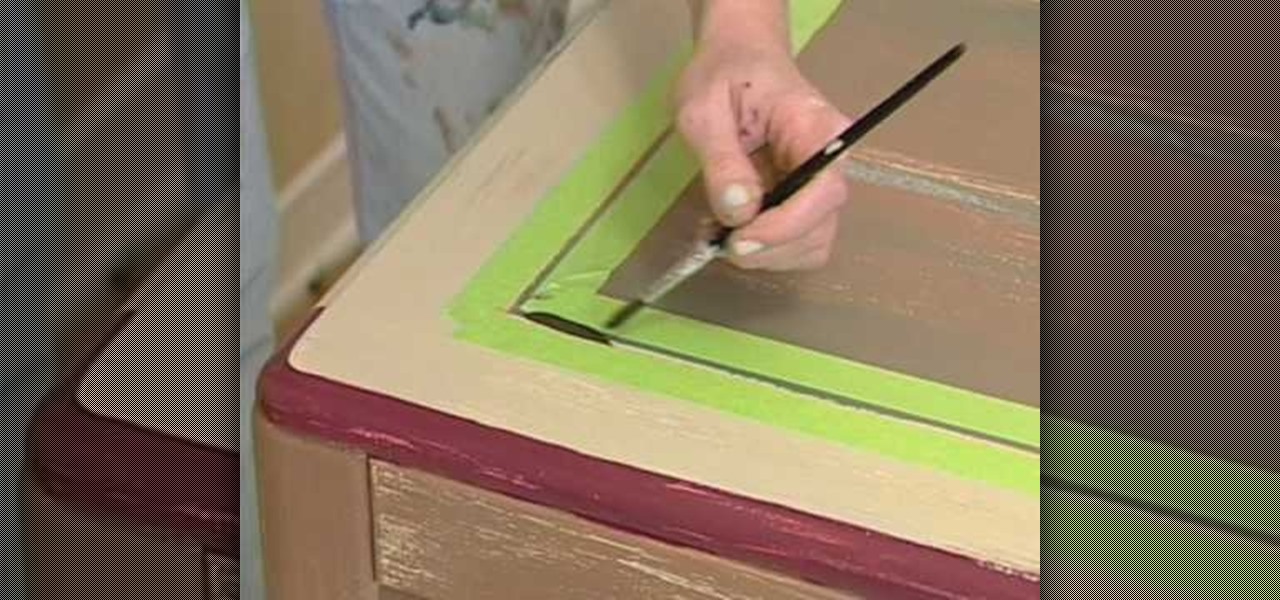
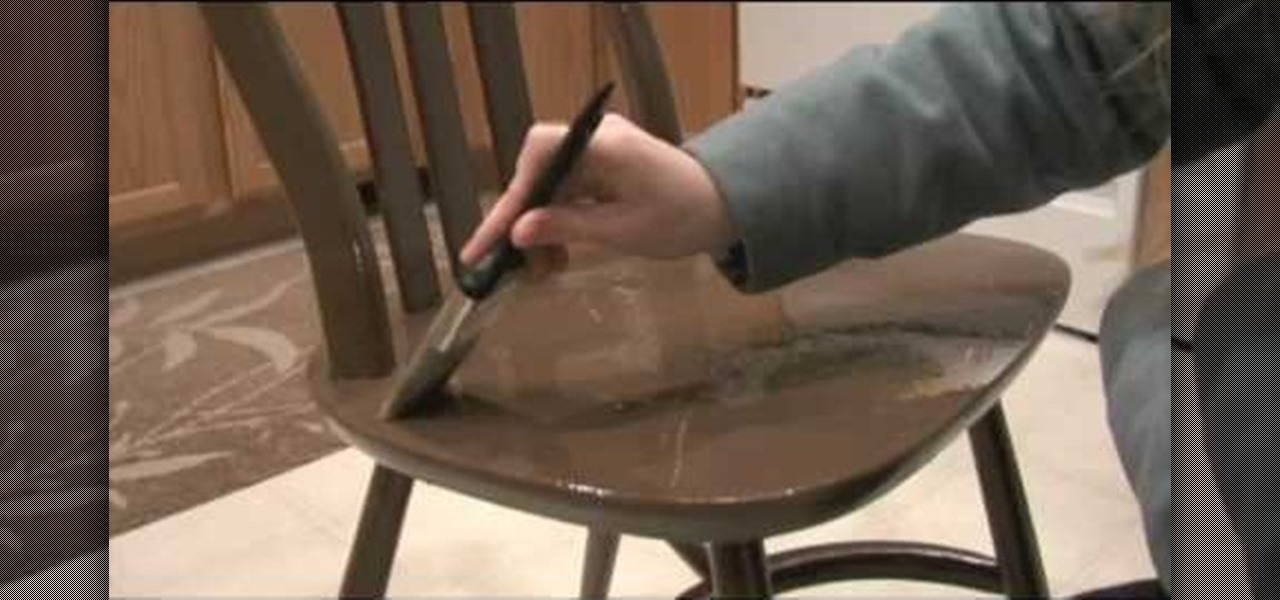
How To: Use the antique distressed paint technique
Using an antique distressing paint finish technique on furniture is a good way to revive a piece of furniture that other wise might just be discarded. This video is part of a series of videos taking viewers through the process of distressing furniture and focuses on accent technique. You’ll want to accent the select parts of the furniture you want to accentuate that distressed look. Our expert recommends painting the edges of this table. You’ll want to pick a complimentary color and when you ...

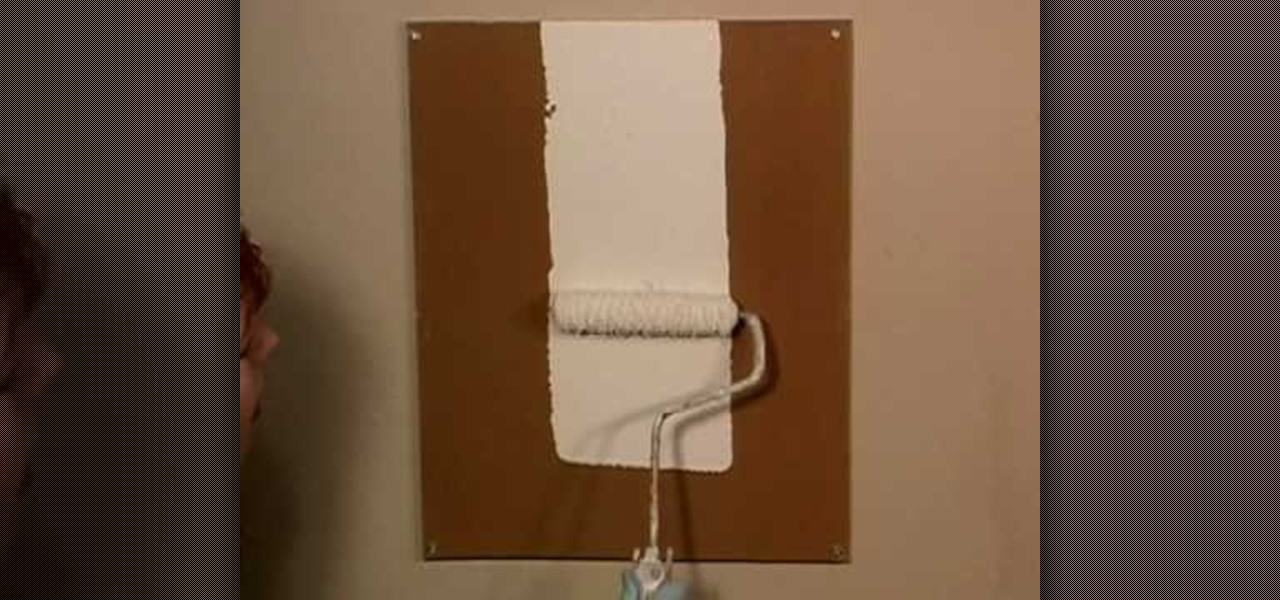
How To: Get a nice, even stain on wood
You will learn how to get a nice, even stain on wood in this Home and Garden video tutorial brought to you by TheSoapGuy. It’s really easy and simple to do. Get a finished piece of wood. You should work in a well ventilated area because wood stain generates a lot of fumes. Wood stain comes in aerosol spray and in cans. Mix the stain in the can by rolling the can. Don’t shake it, it will generate bubbles. Open the can and apply the wood stain with a brush evenly on the surface. The more coats ...

How To: Paint any piece of wood furniture
In this Home and Garden video tutorial you will learn how to paint any piece of wood furniture. The video is from CR8everydaycrafts.com and is presented by Jen Grant. You will need yellow and red color general finishes paint, aging wax, sand paper, a piece of soft cloth and of course your furniture. First fine polish the raw wood furniture. Then paint two coats of yellow general finishes paint. Now paint two more coats of red paint. Allow the each coat to dry before painting the next coat. Af...
How To: Faux paint a rustic texture for a distressed look
Add a custom finish to a dresser or armoire by following the steps outlined in this video tutorial to add a faux finish and distressed technique. This a good way to add a finished to a piece of furniture that looks plain or undone. To begin, used a water-based primer that is tinted in a golden tone. Just paint a thin layer of the primer onto your piece of furniture with a roller or paint brush. You can leave the hardware on since the finish is very crude looking. This means it is okay if you ...

How To: Make a punch bag
This video demonstrates how to make a punch bag. You will need a large duffle bag and a foam yoga mat. First, take your yoga mat and roll it up tightly. Place it upright inside your duffle bag and let expand, forming a lining inside. Next, fill your duffle bag with rags, clothes or any other soft material that you can use as a filler. Make sure that you fill your duffle bag up to the very top, when you've completed this make sure to pull the drawstring tightly and tie it off so nothing falls ...
How To: Faux paint a crackle finish on furniture
In this Home and Garden video tutorial learn how to faux paint a crackle finish on furniture. When working on this type of project, it is best to work on a horizontal surface. However, if you have to work on a vertical surface, this video explains partially how you can faux paint the crackle finish. If you apply the glue to the surface lightly and while painting with a roller, you got to simply glide it over the surface. If you roll it back and forth, it will start to crackle again. But, if t...

How To: Build a retaining wall to flatten a sloped lawn
In this video you will learn how to build a retaining wall to flatten a sloped lawn. He says that if someone wants to garden but their yard is sloped and they know they can't do it, they should know that this is a lot of work. So be prepared to dedicate a lot of time and effort. You start by getting a building permit. If you're looking to build a low retaining wall you start by digging a trench a little wider then the stones and a few inches deep (the higher the wall the deeper the trench). F...

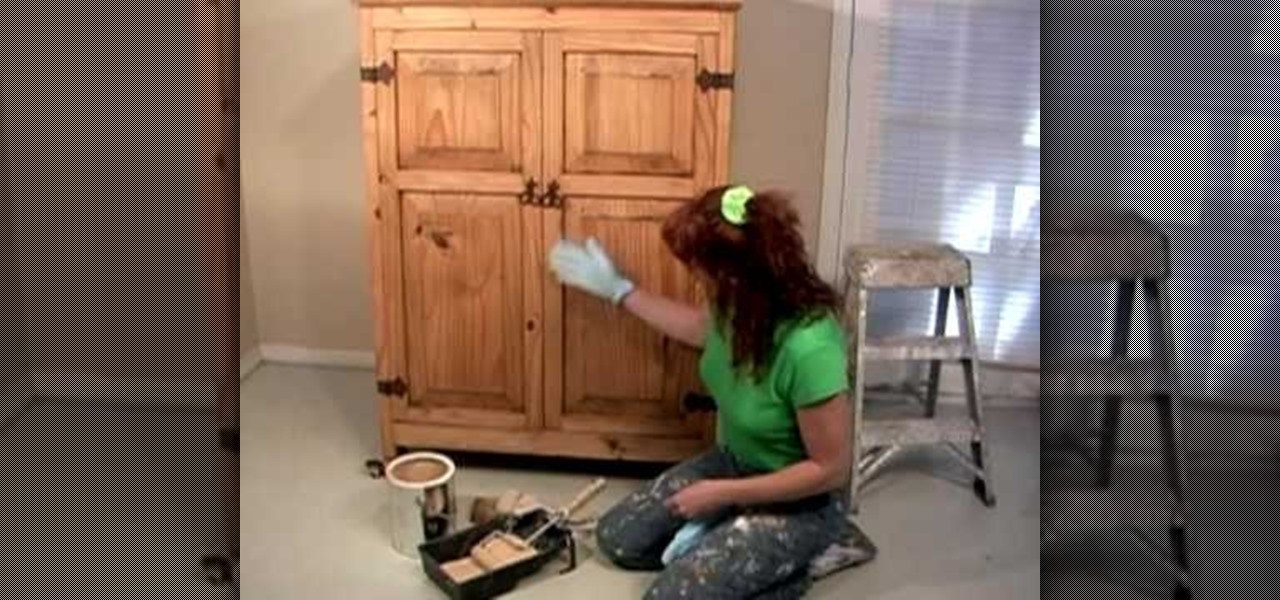
How To: Paint furniture with a faux antique distressed look
In this video we are show how you can make old furniture look softer. It looks really easy but dirty so old clothes and cloves would be advisable. First of all take your glazing color and mix it with a white. Then take mix and mix it with a glazing medium 1 part color and 3 parts glazing medium. After it is mixed well take a brush wipe on a thin layer of the paint/glazing mix. Wiped directly after with a sponge. What will give your old furniture a softer look. But you don't have to stop there...
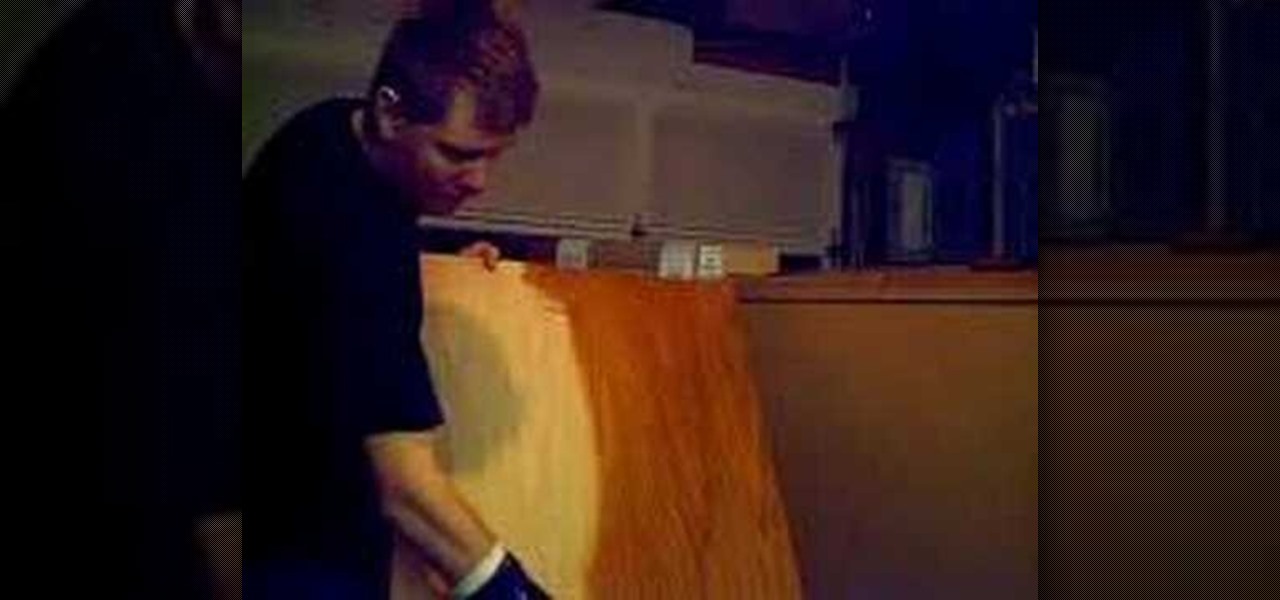
How To: Use wood stain
In this video we are shown the proper way to stain wood. For the demonstration in this video our host uses oak cabinets. Wearing rubber gloves, use a rag to apply the coat of stain. You will want to apply two coats of stain followed by a coat of polyurethane to protect your stain and the wood itself. A rag will ensure an even finish, as opposed to a brush that doesn't always get into the cracks and does not get the coverage that a rag does. With a brush you will have to worry about the bristl...
How To: Assemble a kitchen flat pack
This video demonstrates how to assemble a kitchen flat pack. Everything needed comes packed flat, plus cupboard doors and bench tops are included. The flat pack is a pre-cut custom designed kitchen that can be assembled by yourself. First assemble the cabinets according to the instructions that are provided. The holes are pre-drilled making assembly quick and easy. After you have completed the assembly of your cabinets, attach the adjustable feet to the base so you can level the cabinets with...

How To: Give old furniture a modern makeover
Rather than throwing out your old furniture, learn how to give your old dresser a modern makeover by following this video tutorial. To begin, pull off all of the old drawers and other pieces that do not work. You will need to sand down the frame of the dresser and then replace all of the problematic parts. You may also need to rebuild the center supports so that your dresser drawers slide in and out easily. Wipe down the dresser with a cloth and then coat it with a latex primer. The primer is...

How To: Paint a vintage shabby rose on your furniture
Artist Kate Bangs shows us how to improve old furniture with a shabby rose design. Take vanilla and fuchsia colored paint and mix them together as you paint them on the furniture to form the background. Let that background paint dry. With a watery brush paint the rest of the areas, including raised sections. It is shabby painting and so it does not have to be super neat. Load your brush with pink and white paint and make arches in a circle to form petals. Mix green, pink and white on your bru...

How To: Build a snowboard workbench
In this Home & Garden video tutorial you will learn how to build a snowboard workbench. For this project you will need an old snowboard, some wood and the required tools. Pre cut the wood into these lengths: 4 x 31” and 5 x 29. 5”. From the snowboard remove the bindings and stomp pad if possible. Drill 4 holes at both ends with 3/16 drill bit. Flip the board over and draw lines the center piece of wood to help align it later. Now take 3 piece of 29. 5 long wood and make a ‘U’ shape. You can w...

How To: Install the last row
This video shows how to install the last row of laminate flooring. Take one of the last row pieces of laminate that was cut to size, and tilt it into the laminate floor. Lay a pull bar from your wedge kit across the laminate, and wedge it between the wall and the
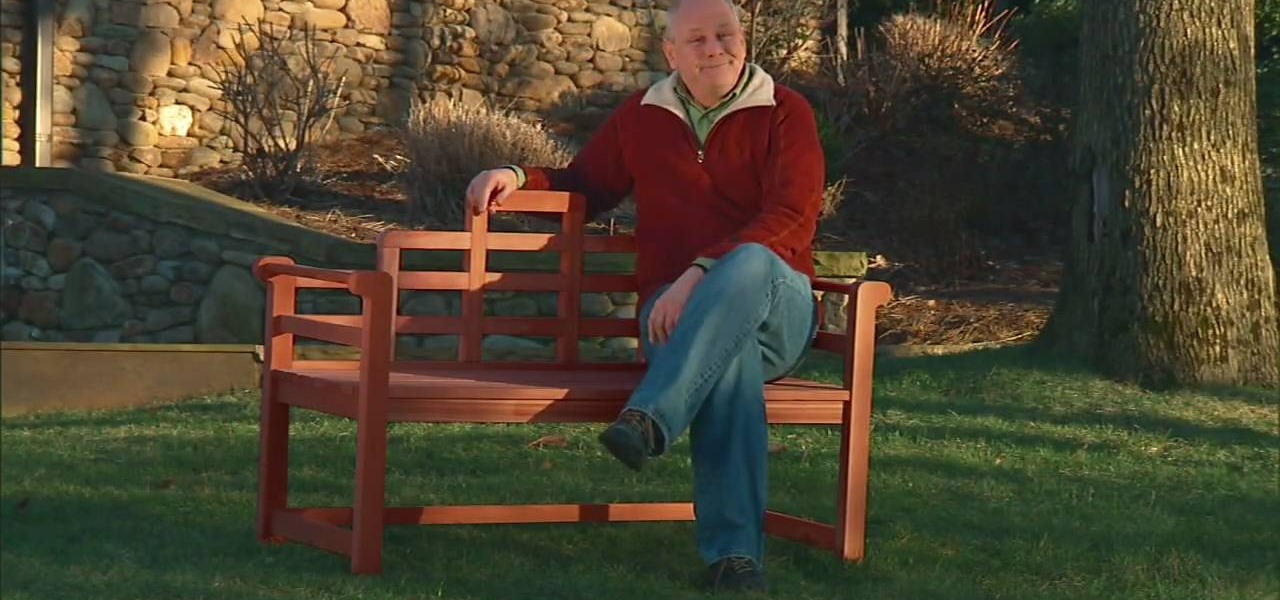
How To: Build an outdoor garden bench with Lowe's
What does your backyard need? A garden. You already have one? Then how about a garden bench? Join Lowe's as they walk you through, step by step, the building of a wooden garden bench. One of the most marvelous things about woodworking is that with just a little planning and effort, you can turn a few boards of lumber into an beautiful and elegant project like this bench.
How To: Install the last row without a pull bar
When you end your last row, there are occasions where you can't use a pull bar. The alternative to using a pull bar is to modify the groove side of the plank that's on the floor. Shave the groove and remove the debris, making sure that there's none in the track. Next, take a small bead of glue and run it down the groove side of your plank. Engage the next plank as close as you can get. Set the plank in place with the pull bar. Finally, tape the plank to its neighbor to secure it until the glu...
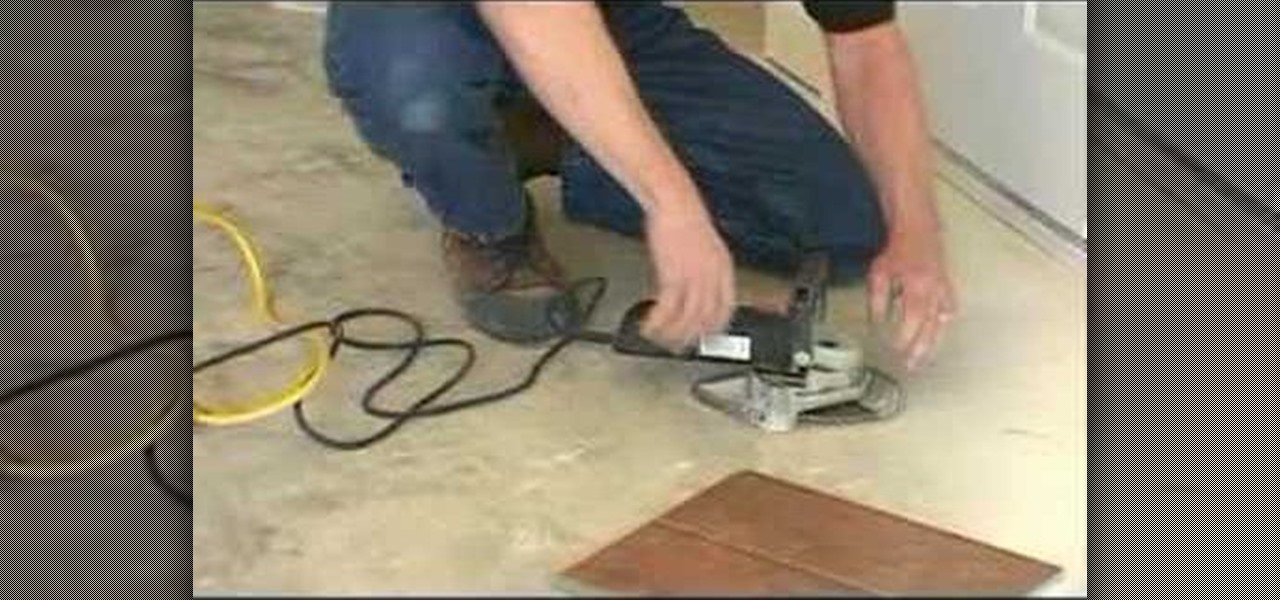
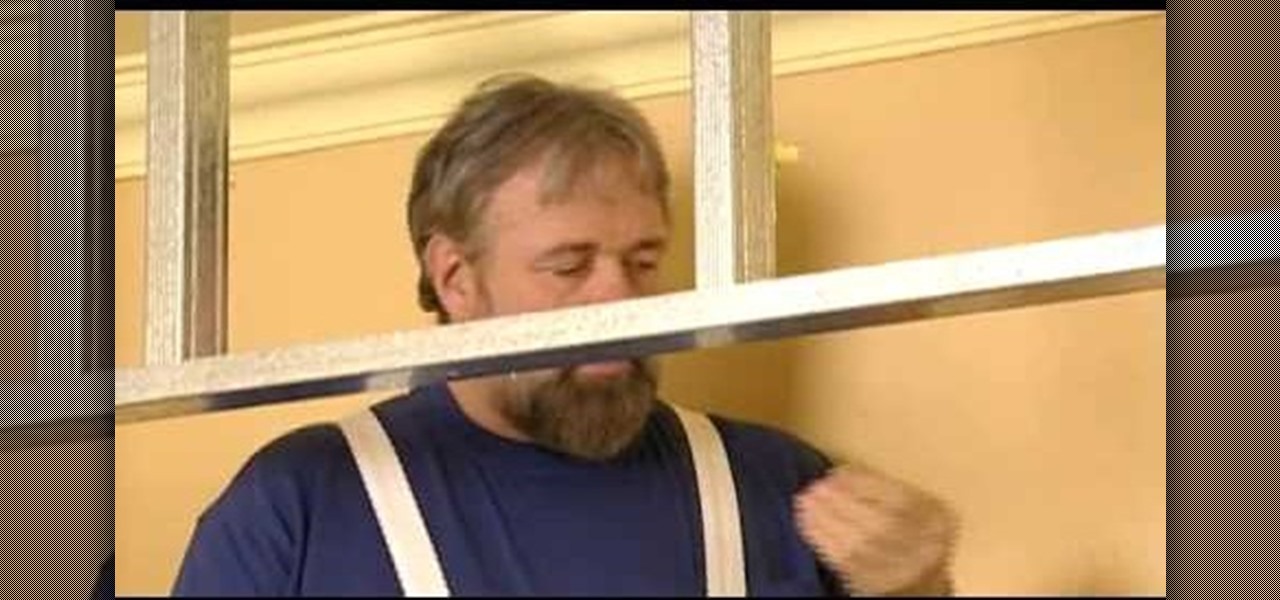
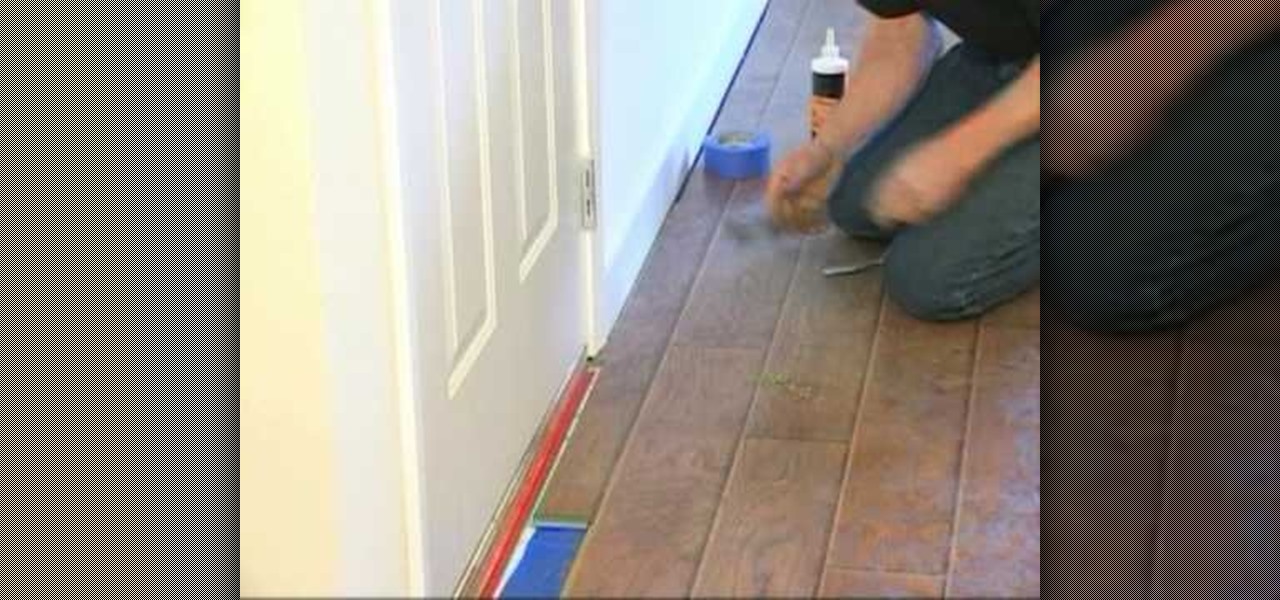
How To: Undercut the door casing
This video demonstrates the proper technique for undercutting the door casing or the molding around the door. You will need to do this when you are laying a laminate floor, otherwise the laminate flooring will not seat underneath the door casing correctly. The first step is to figure out how much you will need to cut out of the door casing. This can be accomplished by measuring the thickness of the laminate flooring plus any underlay you may be using. The presenter demonstrates this with a po...

How To: Age wood
For furniture or wood projects, adding an aged wood look can give real character and interest to an otherwise ordinary object. With a little sanding, stain and lacquer to finish you can transform any wood object.